
How to Dynamically Route Emails in Contact Form 7 on WordPress
Tags: contact form 7 • efficient communication • form submission • pipe • political parties • wordpress plugins
In many businesses, efficient communication is key. Often, customer inquiries need to reach the right department quickly—be it sales, support, or general inquiries. This requirement is not limited to organizations! Political parties also want their respective states’ teams to be notified whenever someone joins from their state or pays membership fees.
The Contact Form 7 plugin in WordPress allows you to achieve this by dynamically routing emails based on a dropdown selection. This ensures that each query or membership alert is promptly notified to the appropriate team.
To send emails to different email addresses based on a dropdown selection in Contact Form 7 on WordPress, you can follow these steps:
Step 1: Install and Activate Contact Form 7 Plugin
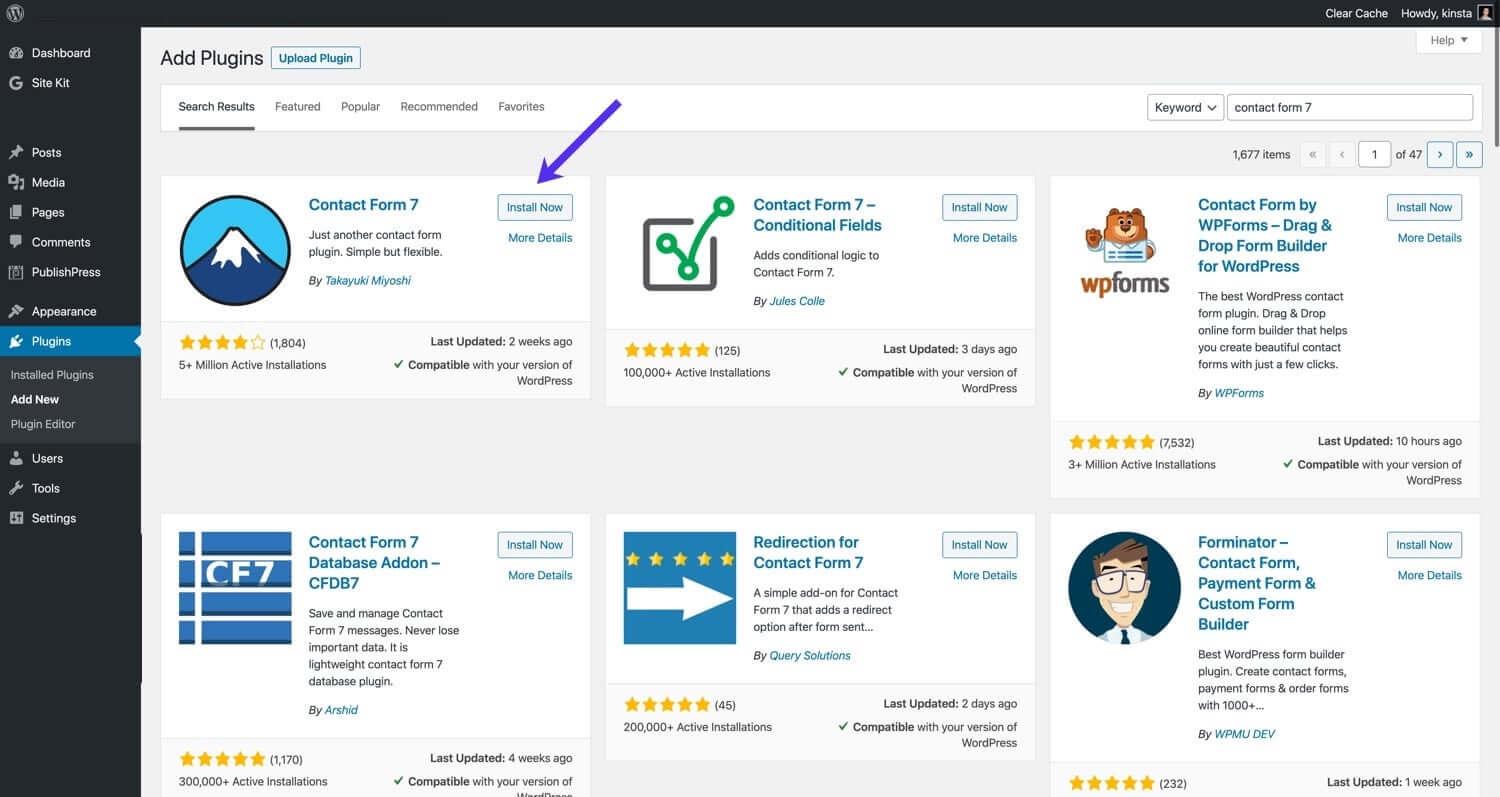
- Go to your WordPress dashboard.
- Navigate to
Plugins>Add New. - Search for the “Contact Form 7” plugin.
- Install and activate the plugin.
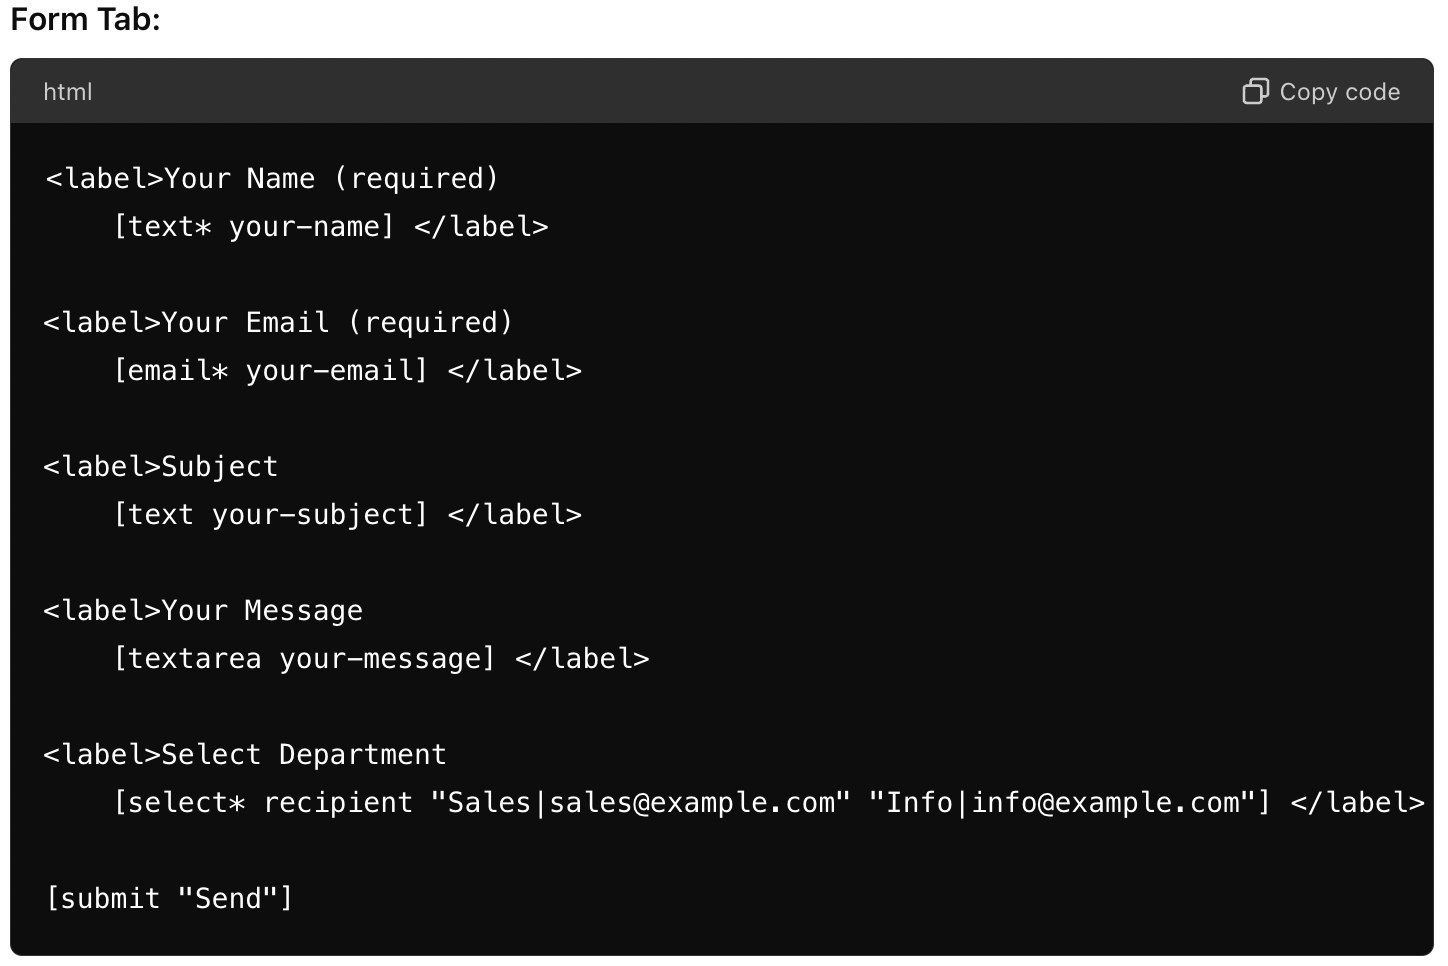
Step 2: Create a Contact Form with a Dropdown Field
- Go to
Contact>Add Newin your WordPress dashboard to create a new form. - Add a dropdown menu to your form. For example:

This creates a dropdown menu where each option (Sales/Support) has a corresponding email address (sales@example.com/support@example.com) linked to it. Note the use of a pipe ('|') to separate the dropdown option from the associated email address.
When the pipe is used in the drop-down as shown above in the code, the value before the pipe (‘|’) is visible and the value after the pipe (‘|’) is invisible. To fetch the value after the pipe, we need to use the mail-tag ([your-recipient] in our case) in the mail templates. To get value before pipe, we have to use [__pipe{field name}] ([ in our case)._pipe
Users can only use this pipe in drop-down, radio buttons, and checkbox components.
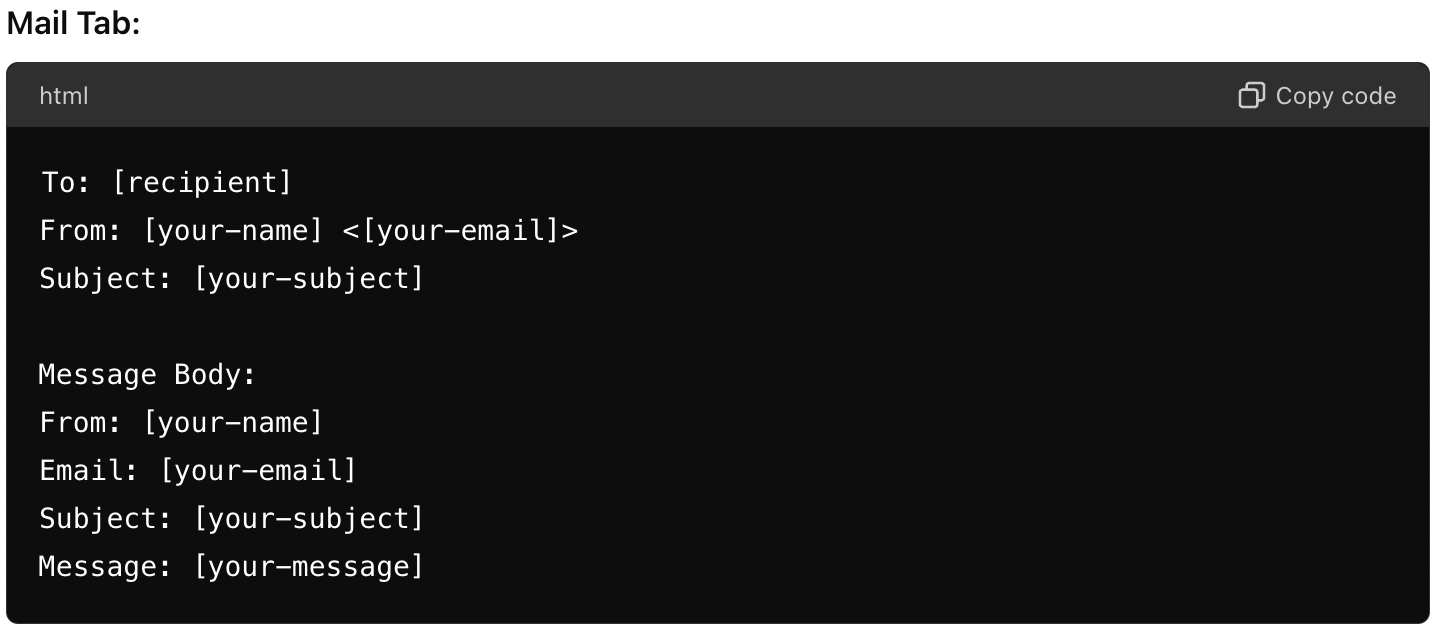
Step 3: Configure the Email Settings
- Still, in the Contact Form 7 editor, go to the
Mail tab. - In the
Tofield, use the mail-tag for the dropdown field. For example, see below:

The shortcode/mail-tag [recipient] in the mail template will dynamically set the recipient email address based on the user’s selection.
Step 4: Add the Form to a Page or Post
- Copy the shortcode provided by Contact Form 7 (found at the top of the form editor).
- Paste the shortcode where you want the form to appear on the page or a post.
Step 5: Test the Form
- Navigate to the page where you embedded the form.
- Fill out the form, select different options from the dropdown to ensure that you send emails to the correct addresses.
Example Code for Contact Form 7
Thus by using a pipe ('|') one can direct form submissions to different email addresses based on the user’s selection.
If you know of a better way to accomplish this utilising a plugin or custom code, please share your ideas or thoughts.
 Previous Post